
Spotlight had their post-Christmas sale on, so I trundled off “just to have a look”. There was such a good deal going on with patterns (excluding Vogue, of course!) that I ended up coming home with 9 of them! (I would have bought more, but they were out of stock of some of them).
Butterick 5708 is one of these patterns. I’ve eyed it off when flicking through the pattern books on several occasions, but it had never made the cut previously. The reduced price twisted my arm, and I thought I’d give it a go.
It’s an intriguing pattern. A reproduction of a 1953 dress, the line art on the pattern cover looks so fetching, doesn’t it? With just a change of the shoulder bow/straps, you can create various looks, from the sweet girl-next-door central image, to sophisticated cocktail dress and summertime holidaying outfit and more. And of course, the ‘models’ are all so glamorous. Just look at them! They are so poised and coy and calm and classy, and they’ve managed to whip themselves up this dress without misplacing a single strand of their perfectly coiffed hair, and their impossibly tiny waists don’t seem to have suffered at all from the post-Christmas bulge. I want their life.

Part of the reason I hadn’t pursued it in the past is because, like those line drawings, it just all seems too good to be true. When I look at it, I hear warning bells in my head – it’s not possible for one dress to ‘do’ all those looks and fit and sit well. It won’t look as flattering as it does on the fictitious ladies, and with those V shaped bodice pieces, altering for sizing and fit is not going to be easy, if at all possible.
I think this is a common problem with vintage patterns and their offerings of glamorous, non-realistic women on the cover. One must ‘filter’ internally and try and reinterpret what the pattern is really doing, and what it is likely to do on a real life figure. I find that looking at the actual line drawings on the back of the pattern (the technical outline of the garment) often helps. For instance, in Butterick 5708, the line drawings show that in none of the variations is the bodice completely ‘wrinkle free’ – so it’s unlikely that the bodice will be super close fitting, particularly given that it’s cut on the bias. It needs to be on the bias in order to manipulate those shoulder ties into all those different shapes; because of this, there will be a certain element of drape (or, if you will, gaping) that will be inevitable.You can see that in all the views, there is an element of a cowl neckline going on. Even the ladies on the front hint at this.
Having said that, the bias-cut lower pieces of the bodice did worry me. A quick look at other encounters with this pattern on Patternreview.com confirmed my suspicions. The pattern didn’t seem to pose a problem for a lucky few, but it seems most people had a lot of trouble with this bodice. I think a few of these people didn’t factor in the ‘drape’ aspect of the bodice, but nevertheless, common complaints were that the tie ends were much bigger in real life than in the drawing, that the bodice sizing runs large, and that the bias cut of the bodice pieces means that nothing sits well. Before I had even begun my version, I felt the project was doomed. I was also surprised by how many people lopped off the length of the skirt, in order to make it look more ‘modern’. I think it needs the length to visually balance the top half. Also, the weight of the skirt probably helps to anchor down the bodice and smooth out any bias wrinkles.
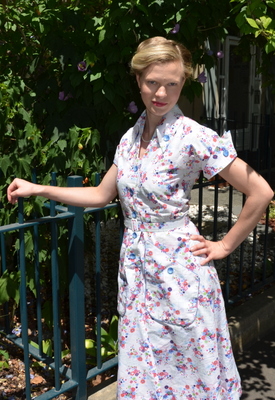
The fabric I used for my version has been in my stash for a couple of years. It’s cotton, and not particularly fabulous quality. I bought it at Lincraft on sale – it was very cheap, and the bold hot pink florals just screamed ‘massive 50’s statement skirt’ at me. It reminded me a bit of the dress Betty Draper wears in one of the early seasons when they go picnicking and they leave all their rubbish behind.
It’s been taking up room in my stash ever since. So much yardage is bulky, so I figured it was time to use it. Plus, as it was cheap, I wasn’t too emotionally attached to it – I didn’t care too much if the whole thing turned out to be a disaster.
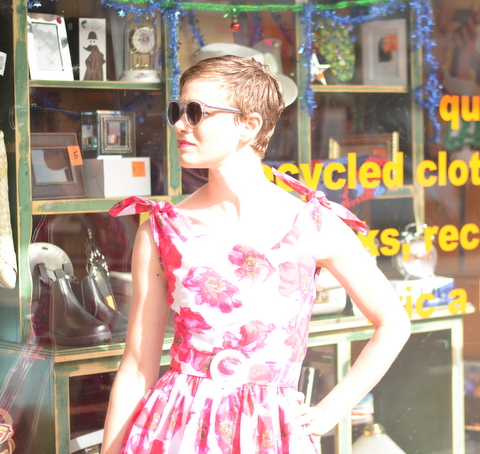
big pink flowers for summer!
As I was feeling impatient and little grumpy, and I had a fair bit of fabric to spare, I didn’t bother making a muslin. I did the usual depressing alterations of grading out the pattern from a size 8 bust through to a size 12. The skirt is so huge, they don’t even bother changing the pattern for the different sizes there!
One thing I did differently that the pattern didn’t call for was I used interfacing on the lower portions of the bodice. I thought this might help to get a ‘stiffer’ look on the bottom part of the bodice, and add a bit of support to the bias cut fabric. The fusible interlining (cotton), didn’t iron on that splendidly and there are a few wrinkles and bubbles that I just can’t get rid of. Perhaps silk organza interlining would be been better. It’s not disastrous though. Overall, I think the interfacing probably did help, actually.
The instructions for this dress are very sparse and not very detailed. They didn’t even tell you to reinforce and clip at the v points before joining the upper and lower bodice parts! Anyone with a bit of sewing experience has probably encountered this before, but if you were a beginner sewer, omitting this tip would really inhibit your sewing pleasure and end result. And as someone on Patternreview pointed out, they don’t bother to tell you to leave the side seam open on the opposite side for the lining- an obvious thing to do if you have made linings before, but not so obvious for the beginner. I’m not sure if these instructions are exactly as they were in the 1950’s, when a lot of knowledge was assumed, but they could really have done with a bit more detail, I think.
I constructed my dress in a different order to that in the pattern. There was no way I was going to attach the whole massive skirt and THEN attach the bodice lining and try and deal with all that bulk and weight! I also waited until the end to insert the zipper, so I could adjust the fit (I ended up taking in the waist seam a fair bit), so I’m glad I did this.
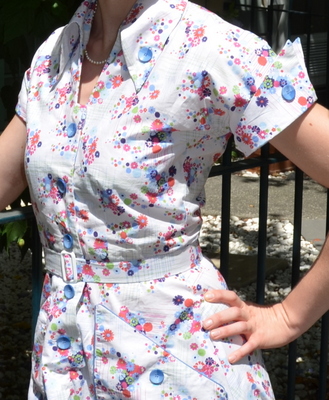
I also made a fabric belt, using buckram as a stiffening and a white plastic buckle I had kicking around. I find that waisted 50’s dresses look awful on me unless there is a belt to cinch in the waist – this is especially the case if the waist is gathered. And boy, is this skirt gathered!! Making this dress reminded me how much I hate gathering full skirts. Ugh!! So fiddly and annoying! Hand stitching around that hem took me hours!

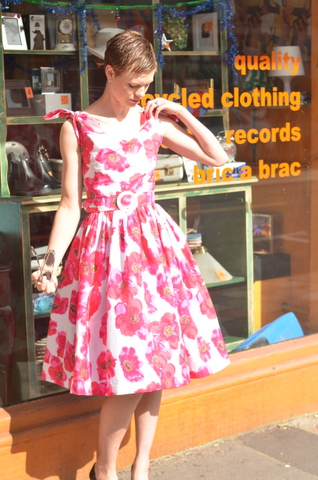
Trying to get the ties to sit right is a little tricky
I don’t love this dress, but I don’t hate it. I probably need to wear it out somewhere and see how I feel about it. I love the hot pink flowers and the full skirt, but the top of the bodice is a bit…weird. The bodice drapes and cowls as anticipated – I’m just not convinced that it’s super flattering on me, particularly on such a small bust. It’s a bit fiddly and takes a while to get the ties in the right position – a bit of twisting helps, I’ve discovered, and you have to be prepared to muck around a bit with it. The fit isn’t super flattering either, but that could also be the fact that it’s January, and I haven’t worked off Christmas yet!
Pros:
- Awesome full skirt
- Summery and fun design
- Only 4 pattern pieces (plus skirt)!
- Relatively straightforward to make
Cons:
- Not much room for alterations in bodice
- weird bias-cut means not super sleek fit in lower bodice
- difficult to get the ties/upper bodice to sit right – inevitable gaping/draping/cowl
- You need a lot of fabric!
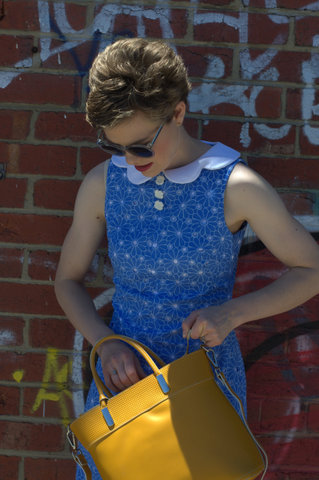
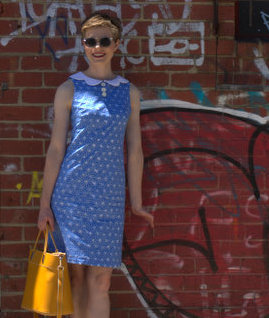
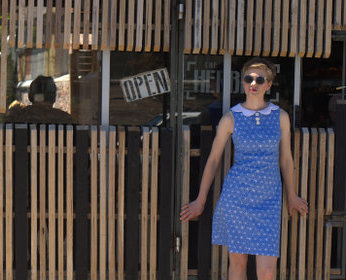
 There’s nothing like the simple lines of a toddler’s dress in crisp cotton to counteract the fussiness of making a silk evening gown. For me, Simplicity 1207 was the perfect antidote to Vogue 2241– fun, straightforward and quick!

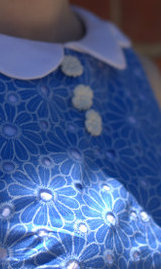
 The dress went together quite smoothly, apart from a few silly mistakes I did (like sewing a sleeve in inside out). The only real alterations I made (if you could call them alterations), were to use an invisible zipper and to hand sew the hems on the dress, sleeves and bias binding neckline. It was good to see that the dress wasn’t massively oversized – I’ve found that many baby and toddler’s patterns just seem to be huge when they are sewn up – for once, this seemed to fit almost perfectly!


Warning: Trying to access array offset on value of type bool in /home4/offermag/public_html/vintagenotions/wp-content/themes/liquorice/header.php on line 28
Warning: Trying to access array offset on value of type bool in /home4/offermag/public_html/vintagenotions/wp-content/themes/liquorice/header.php on line 32
Warning: Trying to access array offset on value of type bool in /home4/offermag/public_html/vintagenotions/wp-content/themes/liquorice/header.php on line 36
RSS Feed