Warning: Trying to access array offset on value of type bool in /home4/offermag/public_html/vintagenotions/wp-content/themes/liquorice/header.php on line 28

Warning: Trying to access array offset on value of type bool in /home4/offermag/public_html/vintagenotions/wp-content/themes/liquorice/header.php on line 32

Warning: Trying to access array offset on value of type bool in /home4/offermag/public_html/vintagenotions/wp-content/themes/liquorice/header.php on line 36
RSS Feed

‘children’s’ Category

  1. A Jaunty adventure with Tadah Patterns

    September 16, 2018 by rosie

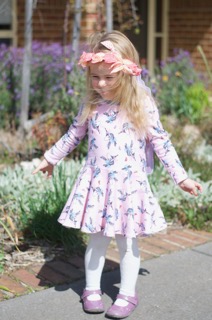
    The ‘Jaunty’ Dress by Tahdah patterns

    Now that our little Miss is (scarily) hurtling towards being a 4 year old, she is becoming more and more vocal about what she wants to wear. At the moment, it’s all about having big twirly skirts, and tutus. She only has one of each, and they are on high rotation in the washing machine…they are the only things she’ll deign to wear. They often end up being worn to bed, and it’s then a full-on meltdown when I need to get them off her to wash them the next day.

    Unicorns, horses and fairies and are all highly coveted, particularly if they are pink, pink, pink! So when I found this French Terry in Spotlight a few months ago, I knew it would be a hit.

    This was my first time using French Terry – I don’t think I’ve ever even seen it in Spotlight before. It’s nice and fuzzy/fleecy on the inside, so it feels soft and cosy, and while it’s cotton, I think it had a little elastane (maybe 5%) so it was comfy and stretchy too.

    I’m actually not a big unicorn fan, so I can’t say I love this print, but the design on the only other French Terry on offer was really quite weird, so it was the only viable option. The musky pink background combined with the unicorns is quite overly saccharine, but at least it doesn’t have sparkles and glitter all over it. And, in the eyes of my almost-4yo, it’s gorgeous.
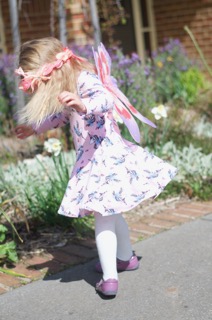
    Fairy wings and head garland entirely optional

    This pattern is from an Australian indie company, Tadah patterns, that I’ve only just discovered. Evidently, I’m very late to the party, as I realised when I joined their facebook group (TahDah Pattern Party). Thousands of people have used these patterns, and there are some gorgeous and inspiring versions of the designs that people have posted. It’s made me all enthusiastic, and now I have dozens more projects added to my mental to do list. It’s amazing how much time can be spent scrolling through the Facebook feed ooh-ing and ah-ing over all the beautiful dresses people have made! It also has made me purchase quite a lot of the patterns. But that’s OK – as I pointed out to my husband, I love that I’m supporting an Australian business.

    I’ve only recently discovered the whole indie pattern thing. I’m not sure how I stumbled onto Tadah Patterns, but I’m so glad I did. I’ve been listening to the British podcast, “Stitchers Brew”, which I’ve been thoroughly enjoying, and it’s made me realise that the whole indie pattern thing is an entire world in itself.

    First, you don’t have to drive to a shop to get a pattern! Or wait days on end for the post to arrive if you order a physical one from one of the big 4’s online. Secondly, you can literally buy an indie pattern online, and BAM! the PDF is in your inbox instantly, ready for you to print off and get sewing. Yes, you have to print off a lot of different pages and tape them together, but honestly, its not as bad or as time consuming as I expected.
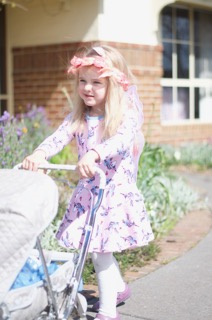
    The perfect dress to wear when taking dolly for a walk.

    So, this is the “Jaunty Dress” by Tadah patterns. The instructions are super clear and thorough, and the whole dress is very quick to make. I read through the instructions to begin with and then pretty much went ahead and made it without referring to them again. It does recommend using an overlocker for all the seams – I decided to give this a go, and on the whole, it wasn’t as traumatic as I was expecting. The seam allowances are very overlocker-friendly at 6mm, so that helps. And I learnt a new trick – the “overlocker flip method”, which helps give a nice clean and secure finish at the end of the sleeves, something I’ve struggled with in the past. Another revelation was using a rotary cutter instead of scissors to cut out the fabric! Brilliant!

    I must admit, this isn’t my best handiwork. I botched one of the seams –the bodice and skirt side seam don’t quite match up, but because it was all overlocked, I wasn’t about to unpick it!. I also managed to make a complete mess of the twin needle topstitching around the neckband. I have NEVER managed to do a good job on this, but this one was so bad, I ended up unpicking it all and calling it quits. If you look closely, you can see where the stitches were, but luckily this is of no concern for its wearer!

    In conclusion, this pattern is great – the full circle dropped waist skirt is comfy and flattering over little tadpole tummies, and affords full twirling capacity for all the ballet/fairy/princess moves. It’s comfy and easy to wear, and comes with quite a few sleeve variations (so I’ll be making some more for the warmer weather – if it ever gets here!). The final garment was, thankfully, met with approval by its fussy recipient; after wearing it all day, she insisted on wearing it to bed as well.
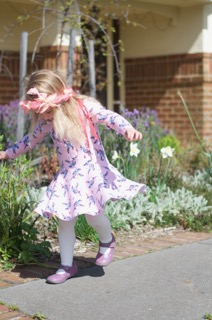
    The circle skirt enables full twirlage
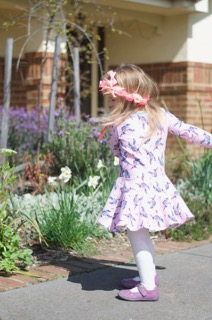
    Did I mention it’s good for twirling?

    This is a size 4 – I made no adjustments to the pattern aside from doing a slightly smaller hem on the sleeves in order to make them a little longer. I probably should have made a 5 so that it would fit next year too, but I didn’t think of that until after it was all cut out. I suspect there will be many more Jaunty dresses in my life for the next few years!

    A very happy customer!


  2. Vogue 9177 – Bishop dress

    June 4, 2017 by rosie

    1
    Smocked dresses instantly remind me of my childhood. My mother was always smocking dresses for me and my sister. Every special occasion was marked by the arrival of a new masterpiece: violin performances and eisteddfods, the annual Mildura show, and sometimes even Christmas and birthdays. It was always exciting when mum brought out the smocking ‘machine’ – a mysterious contraption that seemed to be capable of miracles, as the fabric went in one end taut and smooth and came out the other with perfect pleats, ready for mum to work her magic.

    Aside from the nostalgia, I’ve discovered that I find the act of smocking quite relaxing and addictive. I’ve only made a few things so far, but they have been fun to do, and surprisingly speedy (relatively speaking). Two Christmasses ago, mum got me my very own smocking machine – she bought it off an old lady who didn’t have use for it any more (I think her eyesight may have been failing) – when mum told her it was for her daughter, she was thrilled that it was going to a young person who was keen to learn and carry on the tradition.

    I’ve only been able to use the machine once so far, but I’d love to get it out again soon. I was planning to make a dress for Little Miss A’s 2nd birthday. I was on track for it too – all I had left were the buttonholes when my sewing machine decided to cark it. Six weeks passed while I waited for it to be repaired – needless (and needle-less!) to say the birthday came and went and it was a while before I got back into the swing of things and managed to finish off the dress.

    Vogue 9177 is my first attempt at a Bishop dress. This basically meant that the front and backs are sewn to the arms prior to putting it through the pleating machine. There is a fair amount of fabric involved and I was worried that it would be tricky and fiddly and that it wouldn’t go through smoothly – especially through the French seams- but, I was pleasantly surprised with the results, especially as it was my first foray into using the contraption.

    Here’s a picture of the unpleated dress, with the sleeves attached to the front and backs. So much fabric for such a little garment! It gets all rolled up on a piece of dowell, ready to be put through the pleating machine.

    2

    Here’s the dress going through the pleating machine. Magic!
    3
    4

    After the fabric is pleated, it needs to be ‘blocked’ on an ironing board and steamed into shape. This was the most fiddly part of the whole process..

    5

    After it’s been steamed and blocked for a day or so, it’s time for the fun part! Smocking!6

    The pattern came with instructions and a design for the actual smocking stitches, which meant that I didn’t have to think too hard about making up a pattern. I am slightly annoyed that I didn’t centre the design properly, even though, as you can see, I started in the centre of the garment! It doesn’t really matter, and I don’t think you can really tell, but the fact that I failed to figure this out prior to starting really bugs me. Next time!

    I decided to keep the dress simple and just use plain white embroidery floss for the whole thing. I vaguely toyed with the idea of using red instead, but the lady at the local sewing shop told me that would look tacky, so I stuck to my original vision.

    I have to say, it would have been helpful if the pattern included instructions for using a smocking machine as well as the method of picking up stitches by hand. I had to consult online and a few reference books (thanks mum!) to work out the order and method for pulling up the pleats on the smocking machine.

    I also think that without the additional diagrams and instructions I found in reference books, the instructions that accompanied the pattern would have been a little too vague, at times, to follow properly.

    The satisfying thing about making a Bishop dress is that, once the embroidery is complete, there really isn’t that much extra sewing to do before you have a completed garment! Just a neck binding, sleeve binding, side seams, hem and buttonholes and buttons and that’s it!

    Little Miss A has only worn this dress on two occasions so far. It’s pretty cute on her, and it’s nice and roomy and comfortable, which means I can layer up with singlets and spencers if the weather is a little chilly. I made the shorter length, and I was surprised by how short it really was – I ended up having a very small hem. Next time I’ll do the longer version to rectify that problem.

    This was actually a test garment to practice on before I hacked into some luscious Liberty fabric (wool and cotton blend) that I purchased with a smocked dress in mind. I’m thinking I should make it in the next size up and put it away for next year – she probably doesn’t need that many ‘party dresses’ at this stage.

    All in all, I’m pleased with the result. I reckon I’ll be using this pattern again – I’ll definitely be doing the short-sleeved version at some point for a summer dress.
    89


  3. Australian Home Journal 9044

    May 16, 2017 by rosie

    dsc_0414

    One of the problems with having small children is that they grow so quickly. In terms of sewing, this is a problem because:

    a) I finally get around to sewing her something, and then she hardly gets a chance to wear it because she grows out of it.

    b) She grows so quickly and I have minimal sewing time, so by the time I consult my (somewhat extensive) toddler sewing pattern stash, I realise with horror that half the patterns I’ve been thinking about and dying to make are no longer applicable, because they are too small. I can’t help but mourn for the patterns I may never have the chance to realise.

    So, when my little vintage Australian Home Journal coat pattern arrived in the mail, I decided that I should just go for it and make it ASAP, in order to maximise wear before winter set in. I had a feeling it would be a little on the too big side, but I figured that this was a far better outcome to have than too small – maybe she’ll even get to wear it next winter too!

    It was, of course, exactly around this time that my beloved Bernina started playing up, and I had to take it in to be serviced. SIX WEEKS LATER I was finally able to get stuck into the coat.

    This is definitely a stash slasher. The wool is left over from a project I made about five years ago; the lining was a piece of silk that had been wallowing in a tub for a couple of seasons. Even the inter-lining was a piece of Shapewell I found in mum’s sewing cupboard when I was up visiting at Easter time (thanks mum!).

    As for the pattern itself, I’m guessing it’s from around the 50’s, but that’s really a stab in the dark. I don’t think it had ever been used- it seemed to be still factory folded and I couldn’t see any signs of wear and tear or pin marks etc. I always get a little thrill when I discover an old pattern and I am able to give it another chance at becoming a real garment. Maybe the original pattern purchaser had my problem, and by the time she got around to making this coat, her child was too big for it!

    img_1520Anyway, typical of the era, there were no markings on the pattern, just a couple of punch holes that you have to decipher to tell you where the grain of the fabric is etc. And no separate pattern pieces for linings – just a brief sentence or two about how to alter the existing patterns and the assumption that the reader will figure it out.

    Similarly, the instructions are crammed onto two pieces of paper (the other sides are advertisements for buttons), with tiny hand-drawn illustrations that aren’t always completely accurate. Each ‘step’ actually contains about 4 or 5 steps in one that are sometimes only partially explained, and again, sometimes just assumed knowledge.

    The other challenge was that the front envelope illustration wasn’t a completely accurate depiction of the coat – particularly the collar, which doesn’t meet at centre, as implied in the drawing.

    I confess I did a bit of googling to brush up on bound buttonholes – the ‘instructions’ supplied just didn’t cut it for me! Plus, they used a different method to what I had used previously and I wasn’t confident it would work with such bulky fabric. In the end, the method I went with turned out pretty well in the end and were not as traumatic as I was expecting them to be.

    img_1615

    img_1617Sewing the points of the yoke was a little tricky – trickier than I was anticipating. The finished result isn’t perfect, but luckily, working with such a bulky fabric means that it’s quite forgiving. Still, every time I look at it I wish I had done a better job!

    dsc_0401

    I don’t think I’ve ever done welt pockets before, so this was a new thing for me too. They are not perfectly even which annoys me slightly but I’m glad I gave them a go – it was tempting to just sew right down that seam and omit them altogether!

    dsc_0412The lining is attached by hand to the jacket. I suppose being a child’s jacket, this task didn’t seem too onerous – not sure how I’d feel about doing this in an adult size though!

    I’ve always loved little girls’ jackets, especially with a vintage vibe. I’m glad I had the courage to give this one a go, even if the end result is far from flawless. And yes, it is too big (especially in the sleeves), which I might address at some point if I have the time.

    dsc_0417I should have given it a bit of a press before taking these photos – it had been sitting on the back seat of our car up when I popped it on her and it’s a little crumpled.

    dsc_0408

    Winter is well and truly on its way here in Victoria, so I’m glad I got it done in time. Problem is, its little headstrong owner is refusing to wear any type of jacket (or cardigan or jumper or poncho) at the moment! Maybe next year…